|
|
-- AdminUser - 25 Sep 2019
You can make a free jupyter notebook on notebooks.azure.com by logging in to your microsoft account.
After logging in if you go to 'My Projects' you'll get a list of any projects you have created.
After you perform this, you can see the data files that the notebook instance is loading in the ~/library directory.
 This will open the jupyter notebook in another live window. Menu options are at the top of the screen. Under kernel you can change the tyep of kernel to python or R.

Creating a new project:
You can start a new project by hitting 'New Project' and entering in a name or project id. You can import a jupyter notebook project from a hithub repository by clicking 'Upload githup repo' and adding in the github id in the given field and giving a project name and project id. If you need all files and directories in the repository click on clone recursively.Terminal:
To start a terminal so you can explore your project space go to your 'My Projects' screen and select the bubble on the left of your project name. Then click the Terminal button that's to the left of the New Project and Upload Github Repo buttons.
Running a project:
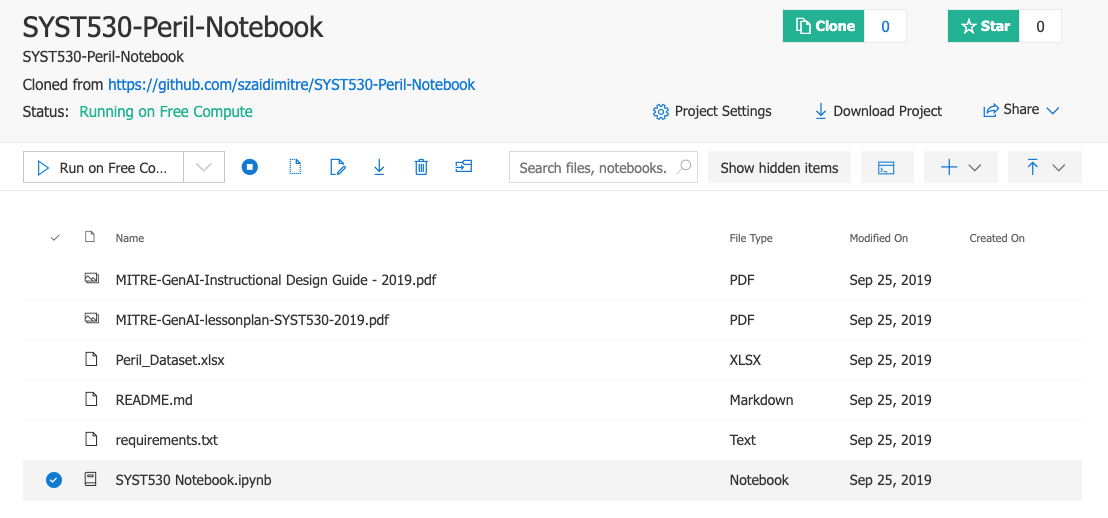
If you have a directory with several files in it you'll need to select the notebook file to start it up the jupyter instance by going to your My Projects, then clicking on the name of the prject to reveal the list of files. Select the blue bubble next to the notebook file you want to run, then click the 'Run on Free Compute' button (or select another virtual machine if available).
This will open the jupyter notebook in another live window. Menu options are at the top of the screen. Under kernel you can change the tyep of kernel to python or R.


| I | Attachment |
Action | Size | Date | Who | Comment |
|---|---|---|---|---|---|---|
| |
Screen Shot 2019-09-25 at 4.31.51 PM.png | manage | 12 K | 25 Sep 2019 - 21:39 | AdminUser | |
| |
Screen Shot 2019-09-25 at 4.57.20 PM.png | manage | 87 K | 25 Sep 2019 - 21:59 | AdminUser | |
| |
Screen Shot 2019-09-25 at 5.10.45 PM.png | manage | 145 K | 25 Sep 2019 - 22:11 | AdminUser |
Edit | Attach | Print version | History: r2 < r1 | Backlinks | View wiki text | Edit wiki text | More topic actions
Topic revision: r2 - 26 Sep 2019, AdminUser
Ideas, requests, problems regarding Foswiki? Send feedback