You are here: Foswiki>Main Web>WebTopicList>GlobusGettingStarted (07 Oct 2025, AdminUser)Edit Attach
Getting started
To get started with globus download Globus Connect Personal client by getting an installer for your machine here. Once you install Globus connect personal on your machine it will now be what is considered a globus endpoint once the program is running.Installing Globus
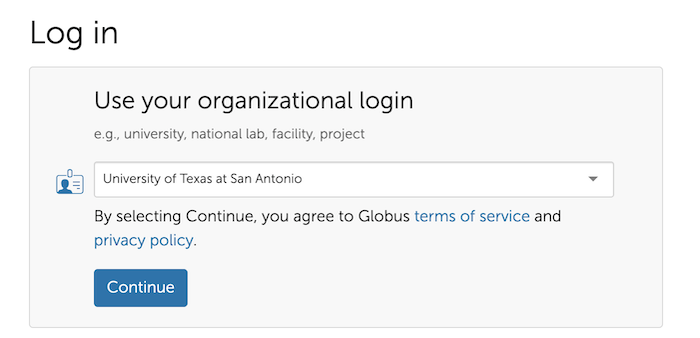
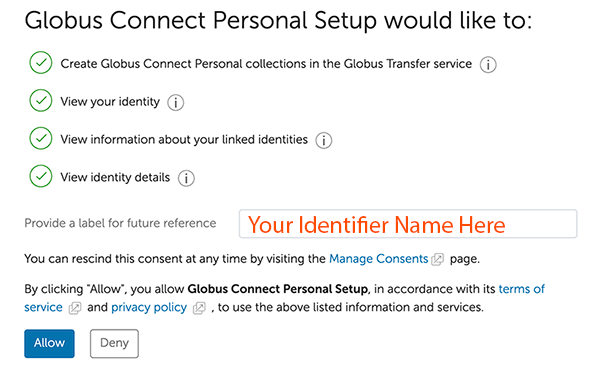
When you first run the installer it will ask you to log in. Select University of Texas at San Antonio and follow the prompts. When prompted for a login on installation you will select University of Texas at San Antonio and log in via your UTSA ID and password. After you log in you'll be asked to give permissions to the application and add a tag to your machine to give it a unique identifier. Chose an identifier that lets you identify the machine you're installing it on (home laptop, office desktop, etc).
 After you enter in an identifier for the machine and click 'Allow' you will be brought to the following prompt called 'Collection Details' where you will enter in details for your initial collection on your machine.
Your owner identity will be your UTSA Id that you used to log into globus from the previous screen followed by '@utsa.edu,' you cannot change this.
Next you enter in a name for this collection. A collection is a directory on your machine that you can use to share from, it will be searchable on the globus network when you log into https://app.globus.org when your machine is on and globus is running. More info at this link. Try using a name that is unique to you so you can set up something that is distinctly searchable when you need to share your collection.
Then you can enter in a description of the machine. Enter in information that will let you know which machine you are accessing. It's possible to have globus running on multiple machines and it's good to put information that allows you to pinpoint which machine in which location you are accessing.
UTSA subscribes to the High Assurance feature, if you want your machine to run a high assurance collection, see the following section on high assurance.
 After you confirm and save your details globus will be running and you can search for the Collection Name on the globus network.
More info for installation for windows/mac/linux can be found at this link.
Note of possible Mac OS Seqouia networking error.
If you are running Mac OSX Seqoia and globus gives you an error "Directory Listing Timed Out" when trying to connect to your collection check to see if the local network access for it is turned on by clicking on System Settings, then Privacy & Security, then click on Local Network. Make sure the switch for Globus Personal Connect is switched on.Turning on High Assurance for your collection
UTSA has access to the high assurance subscription, so as a UTSA user you can create a high assurance collection on your machine. Cick the checkbox for High Assurance and you'll get another prompt. The prompt lets you know:- Once you create an HA collection it can't be changed later, you'd need to delete the collection and recreate it as a regular collection to turn the feature off.
- You need to log in again with your UTSA ID to verify you have access to High Assurance.
- You need to enter a timeout value. This is an amount of time you can remain connected to your collection while idle. After the determined set of time you'll be required to log back in to ensure that it is you accessing the collection.
 After you create the HA collection you'll need to update the subscription status. Click on the globus menu icon, then click on Web: Collection Details. On the Right you'll see a button called Edit Subscription Status.
 Once you click that button you'll be given another prompt. Select University of Texas at San Antonio on the radio button, then click Save Changes, after which you'll be asked to log in again.
 After you successfullly log in again, your collection is now High Assurance and should be indicated by a green lock wich a checkmark
  For the complete Globus documentation for High Assurance Collections click this link.
 Edit | Attach | Print version | History: r9 < r8 < r7 < r6 | Backlinks | View wiki text | Edit wiki text | More topic actions
Topic revision: r9 - 07 Oct 2025, AdminUser
 Copyright © by the contributing authors. All material on this collaboration platform is the property of the contributing authors.
 Ideas, requests, problems regarding Foswiki? Send feedback
